Quantum Encryption System
Build a Quantum Encryption System with Arduino
Learn how to build a quantum-inspired encryption system using Arduino with a step-by-step guide, including code, components, and practical insights.
Quantum computing represents a paradigm shift in computational power, promising to revolutionize many fields, including cryptography. As traditional encryption methods face potential threats from quantum computers, the need for quantum-resistant encryption techniques becomes increasingly important. This blog will guide you through the process of building a quantum computing-based encryption system using Arduino, providing detailed explanations and code to help you understand and implement these cutting-edge concepts.
Step 1
Understanding Quantum Computing
Please be sure to read carefully, or else you will not understand.
What is Quantum Computing?
Quantum computing is a type of computation that utilizes the principles of quantum mechanics, a fundamental theory in physics that explains how matter and energy behave at the atomic and subatomic levels. Unlike classical computing, which uses bits to process information as either 0s or 1s, quantum computing uses quantum bits, or qubits, which can represent and store more information due to their ability to exist in multiple states simultaneously.
Quantum Algorithms and Encryption
Quantum algorithms leverage the unique properties of qubits to perform tasks that are infeasible for classical computers. One of the most famous quantum algorithms is Shor’s algorithm, which can factorize large integers exponentially faster than classical algorithms, potentially breaking widely used encryption methods like RSA. This has led to the development of quantum-resistant encryption algorithms and quantum key distribution (QKD) protocols.
Superposition and Entanglement
Superposition refers to a qubit’s ability to be in a combination of states simultaneously. For example, a qubit could represent both 0 and 1 at the same time. Entanglement is another quantum property where two or more qubits become linked, so the state of one qubit can directly affect the state of another, no matter the distance between them.
These properties are the foundation of quantum algorithms that can solve problems like factorization exponentially faster than classical algorithms, posing a potential threat to current encryption methods.
Quantum Bits (Qubits) vs. Classical Bits
A classical bit can be in one of two states, 0 or 1. A qubit, on the other hand, can be in a state of 0, 1, or any quantum superposition of these states. This property allows quantum computers to perform complex calculations much faster than classical computers.
Step 2
Quantum Cryptography: An Overview
Why Quantum Cryptography?
Quantum cryptography leverages quantum mechanics to provide secure communication. Unlike classical cryptography, which relies on complex mathematical problems that could be solved by a sufficiently powerful quantum computer, quantum cryptography offers security based on the laws of physics. The most well-known application is Quantum Key Distribution (QKD), which allows two parties to securely exchange encryption keys.
Post-Quantum Cryptography
While QKD offers a quantum-based approach to secure communication, post-quantum cryptography focuses on developing classical cryptographic algorithms that are resistant to quantum attacks. These algorithms are designed to be secure against both classical and quantum adversaries.
Quantum Key Distribution (QKD)
QKD allows two parties to generate a shared, secret key, which can then be used to encrypt and decrypt messages. The security of QKD lies in the principles of quantum mechanics: any attempt to eavesdrop on the key exchange will inevitably alter the key, alerting the communicating parties to the presence of an intruder.
The BB84 protocol, developed by Bennett and Brassard in 1984, is one of the first and most widely studied QKD protocols. It uses the polarization of photons to encode and transmit bits.
Challenges in Quantum Cryptography
Quantum cryptography, while promising, faces several challenges. These include the need for specialized hardware, the potential for errors due to quantum decoherence, and the difficulty of integrating quantum systems with existing classical infrastructure.
Step 3
Building Blocks of Quantum-Based Encryption
Quantum Random Number Generation
Randomness is crucial for secure encryption, and quantum mechanics offers true randomness. Quantum random number generators (QRNGs) utilize quantum processes, such as the behavior of particles, to generate random numbers that are inherently unpredictable.
Quantum Key Exchange Protocols
Key exchange protocols are essential for establishing secure communication channels. Quantum key exchange, such as QKD, ensures that keys are exchanged securely, with the assurance that any attempt to intercept the key will be detected.
Implementation on Classical Hardware
While true quantum computers are still in development, many quantum principles can be simulated on classical hardware, such as microcontrollers. This allows us to experiment with quantum concepts using readily available technology, like Arduino.
Step 4
Arduino and Quantum Computing
Introduction to Arduino
Arduino is an open-source electronics platform based on easy-to-use hardware and software. It’s a popular tool for creating interactive projects, ranging from simple LED controllers to complex robotics.
Why Arduino for Quantum Experiments?
Arduino, with its versatility and ease of use, provides an accessible platform for experimenting with quantum concepts. While it can’t directly simulate quantum phenomena, it can be used to implement quantum-inspired algorithms and encryption methods, making quantum computing more tangible for enthusiasts and students.
Integrating Quantum Concepts with Arduino
In this section, we’ll explore how to simulate quantum principles, such as superposition and entanglement, using Arduino. We’ll also look at how to implement quantum-inspired encryption techniques on this platform.
Step 5
Detailed Circuit Description
Please be sure to read carefully, or else you will not understand.
Components Required
To build the RFID-based attendance system, you will need the following components:
- Arduino Uno (or any compatible microcontroller)
- LED (one or more) { LED: The anode (long leg) is connected to digital pin 13, and the cathode (short leg) is connected to GND through a 220Ω resistor.}
- Push Button (one or more) { One side is connected to 5V, and the other side is connected to digital pin 2 with a 10kΩ pull-down resistor connected to GND.}
- Resistors (220Ω for LEDs, 10kΩ for buttons)
- Breadboard and Jumper Wires
- Jumper Wires
- Resistors (220 ohms for the LCD backlight)
- Potentiometer (for LCD contrast adjustment)
- Buzzer (optional, for feedback)
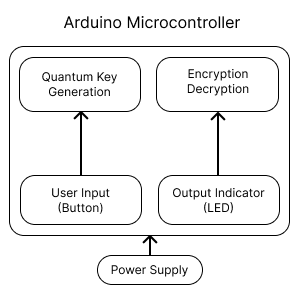
This wiring setup is a fundamental way to interact with the Arduino using a button and an LED, simulating aspects of quantum encryption where the button can be used to control or initiate key generation processes and the LED indicates the status.
Step-by-Step Wiring Instructions:
LED Wiring:
- Place the LED on the breadboard.
- Connect the anode (long leg) of the LED to digital pin 13 on the Arduino using a jumper wire.
- Connect the cathode (short leg) of the LED to one end of the 220Ω resistor.
- Connect the other end of the resistor to the GND (Ground) rail on the breadboard.
- Use a jumper wire to connect the GND rail to one of the GND pins on the Arduino.
Button Wiring:
- Place the button on the breadboard.
- Connect one side of the button to the 5V (VCC) pin on the Arduino using a jumper wire.
- Connect the other side of the button to digital pin 2 on the Arduino using another jumper wire.
- Place a 10kΩ resistor between the button pin (connected to pin 2) and the GND rail on the breadboard. This acts as a pull-down resistor to ensure that the input reads LOW when the button is not pressed.
- Optionally, connect the other side of the button (same side as the 10kΩ resistor) directly to the GND rail on the breadboard for stability.
Powering the Arduino:
- Connect your Arduino to your computer via USB to power it and upload the code.
Step 6
Circuit Design
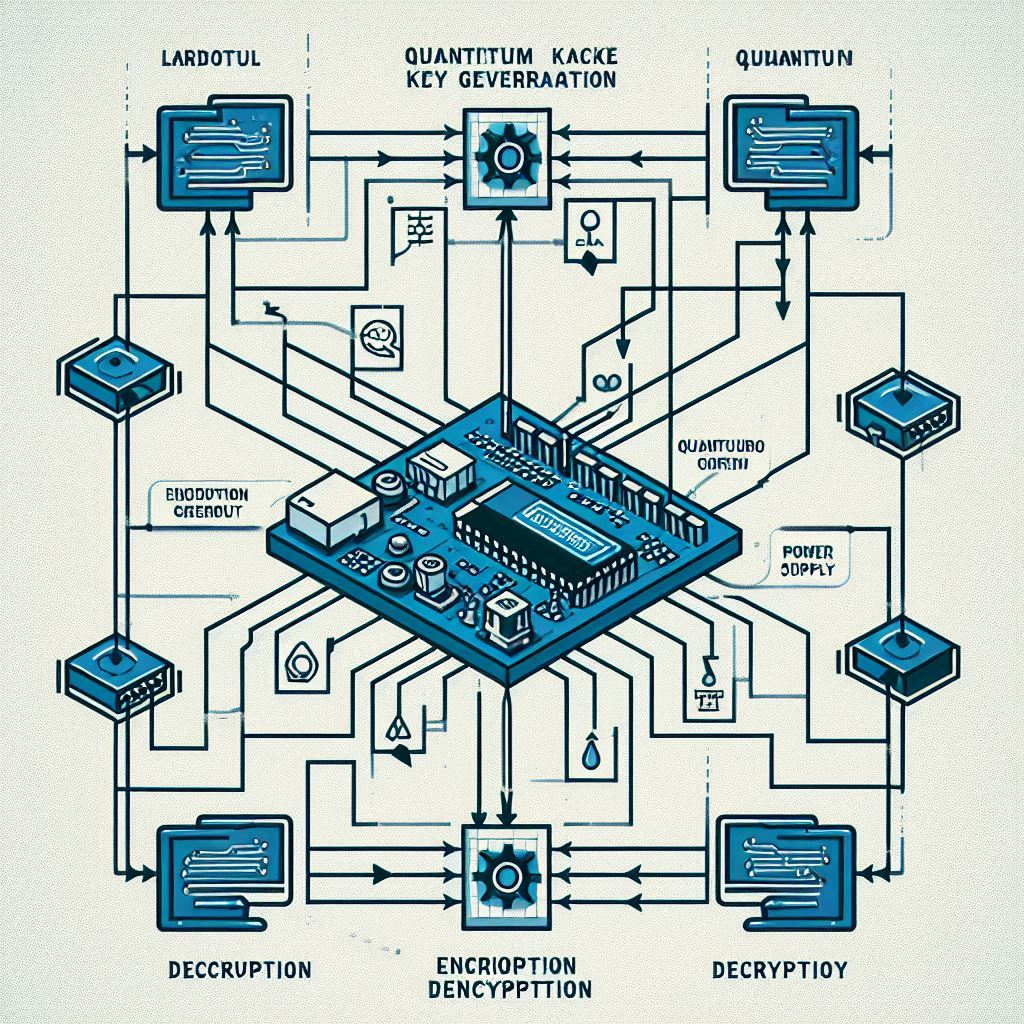
3D Block Diagram

Simple Block Diagram

Step 7
Step-by-Step Guide to Building the System
Step 1: Setting Up the Arduino Environment
Installing Arduino IDE
Connecting Arduino to Your Computer
Step 2: Programming Quantum-Based Encryption in Arduino
Understanding the Code Structure
Before diving into the code, it’s essential to understand the structure of an Arduino program. An Arduino sketch typically consists of two main functions: setup() and loop(). The setup() function runs once when the program starts, while the loop() function runs continuously.
Writing the Quantum Key Distribution Code
To implement quantum key distribution on Arduino, we need to simulate the behavior of quantum bits using classical hardware. Here’s an example of how you might start writing such a program:
Quantum Key Distribution Code
In this simple example, we generate a random binary key and use LEDs and buttons to simulate the key distribution process. This is a basic introduction to the concept, which can be expanded with more complex logic.
Implementing Encryption Algorithms
Once you’ve set up the QKD simulation, you can implement encryption algorithms that use the generated key. For example, you could implement a simple XOR-based encryption, which uses the generated quantum key to encrypt and decrypt messages.
Implementing Encryption Algorithms
This code example demonstrates a basic encryption and decryption process using an XOR operation. The key used here is a static string, but in a real application, it would be dynamically generated using the QKD process.
Step 3: Testing and Debugging
Simulating Quantum Behavior
Debugging Common Issues
Step 4: Deploying the System
Integrating with Real-World Applications
After testing and refining your system, you can integrate it into real-world applications. This could involve using the encryption system to secure communication between two Arduino-based devices or interfacing with other microcontrollers and sensors.
Ensuring Security and Efficiency
Security is paramount in encryption systems. Ensure that your quantum-inspired encryption method is robust against potential attacks and that it operates efficiently on the Arduino hardware. Consider using additional security measures, such as hardware random number generators, to enhance the system.
Step 8
Step 9
Conclusion
The Future of Quantum Encryption
Quantum computing and cryptography are rapidly advancing fields with the potential to transform cybersecurity. By exploring quantum-inspired encryption systems using Arduino, we can gain a deeper understanding of these concepts and prepare for the future of quantum security.
Practical Considerations and Final Thoughts
While true quantum computers are still in development, experimenting with quantum-inspired encryption on classical platforms like Arduino provides valuable insights and a strong foundation for future work. As quantum technology continues to evolve, staying informed and hands-on with these concepts will be crucial for anyone interested in cybersecurity and cryptography.


Leave a Reply